Hubspot
Hubspot is a Customer Relationship Management (CRM) platform for inbound marketing, sales, and customer service. Our integration leverages the search API among others to sync data to OpenGTM. Below are the steps to setup a Hubspot integration in OpenGTM.
Getting Setup
If setting up on mobile, this experience works best from the landscape orientation.
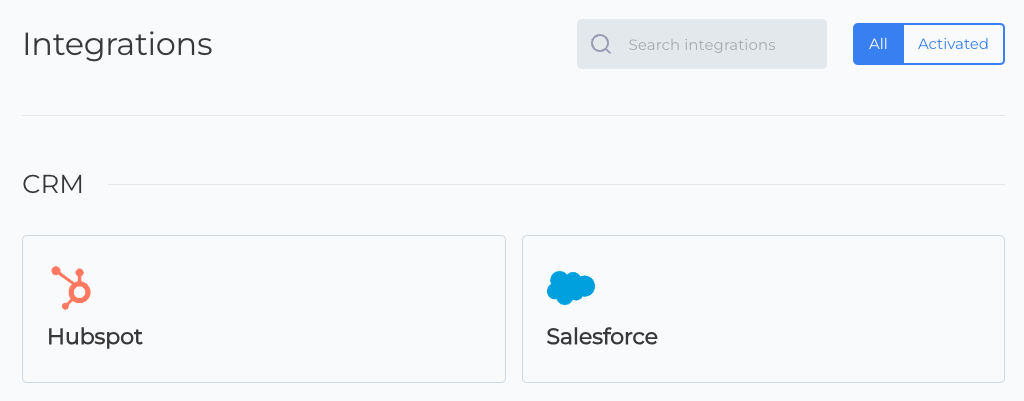
Step 1: Navigate to the Integrations Page and Select Hubspot
-
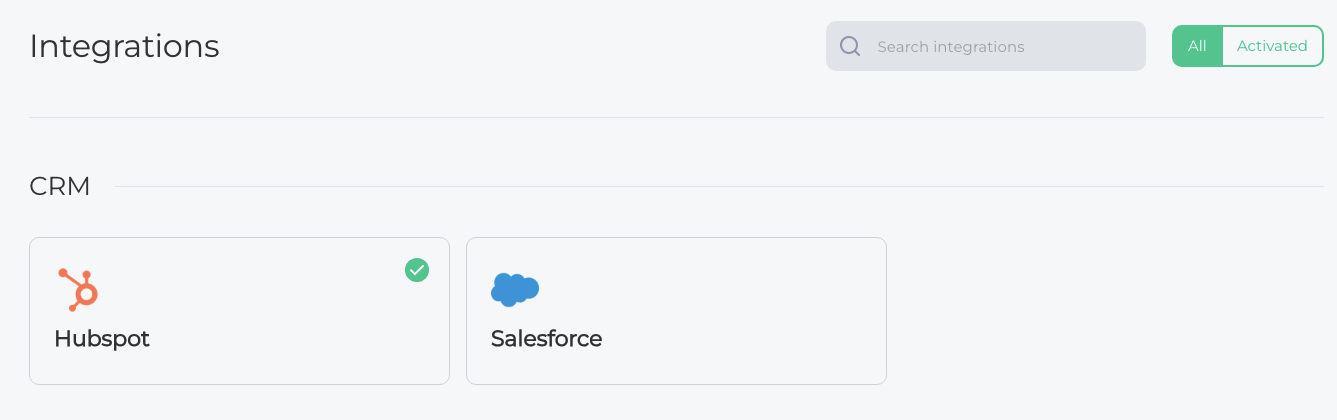
Open Integrations: Log in to the OpenGTM platform and navigate to the 'Integrations' page using the side navigation menu.
-
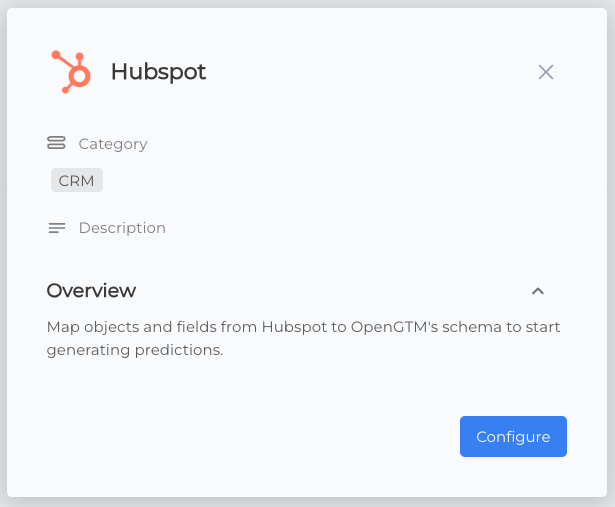
Choose Hubspot: From the list of available integration options, select 'Hubspot'. From the Hubspot settings menu. Select on the Configure button to begin the setup process.
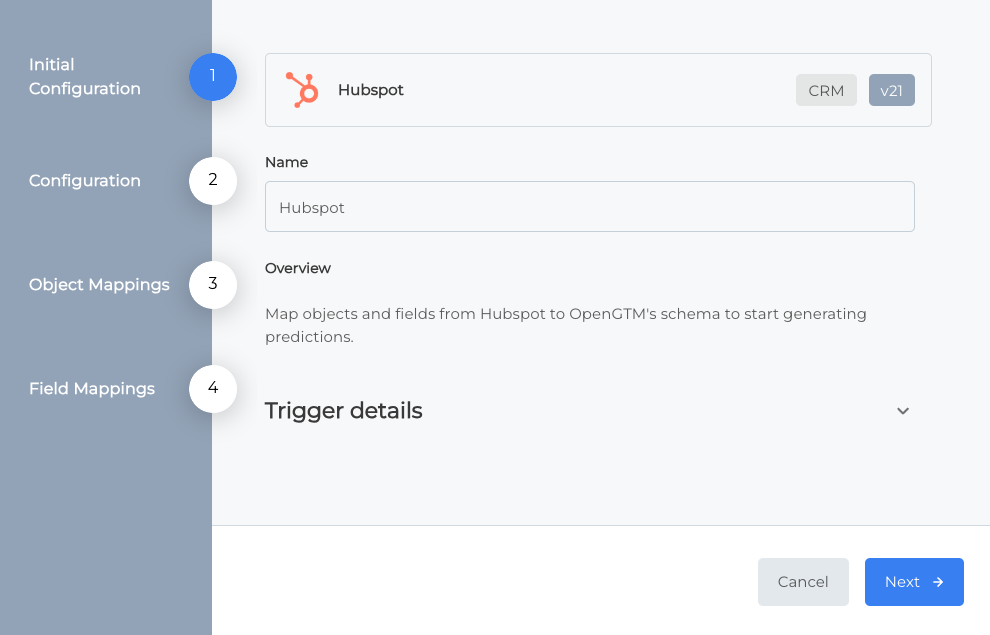
Step 2: Confirm Configuration
-
Initial Configuration: The first screen you'll encounter is the initial configuration page. Here, details of the Hubspot integration will be displayed. This is also where you will update the integration as updates become available.
-
Confirm Configuration: No actions are required here, select on the Next button to move on to the next step.
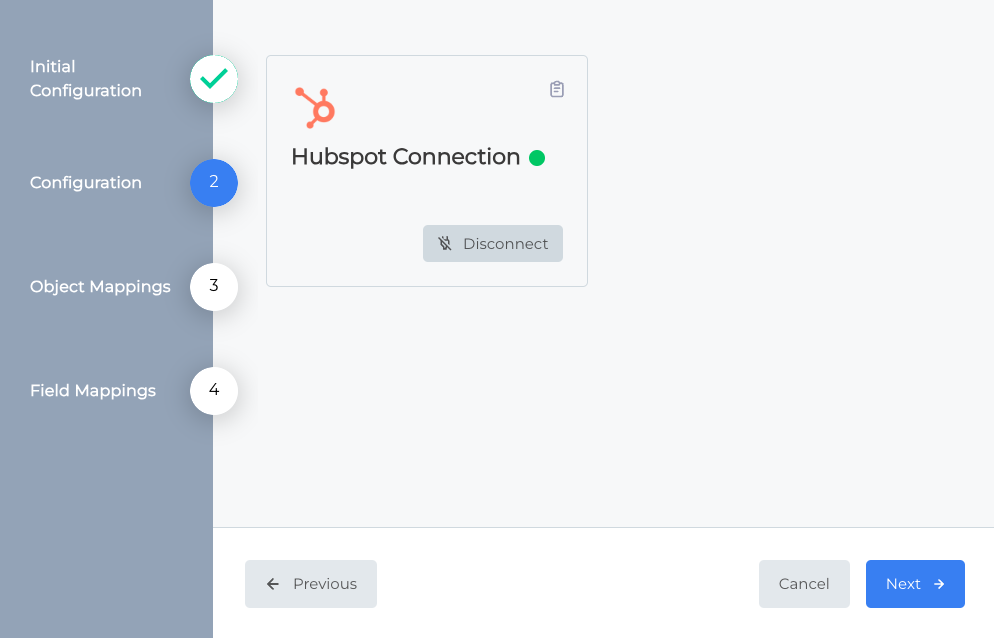
Step 3: Authenticate with Hubspot
-
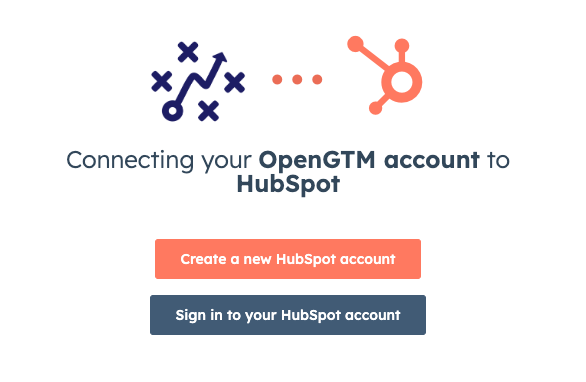
Initiate Authentication: After confirming the configuration, proceed to the next step, which involves authenticating with Hubspot. Select the Connect button initiate this process.
-
Login to Hubspot: A new tab will open and you will be redirected to Hubspots login page. Enter your Hubspot credentials and login to your account.
tipEnsure that you have the necessary permissions to enable integrations.
-
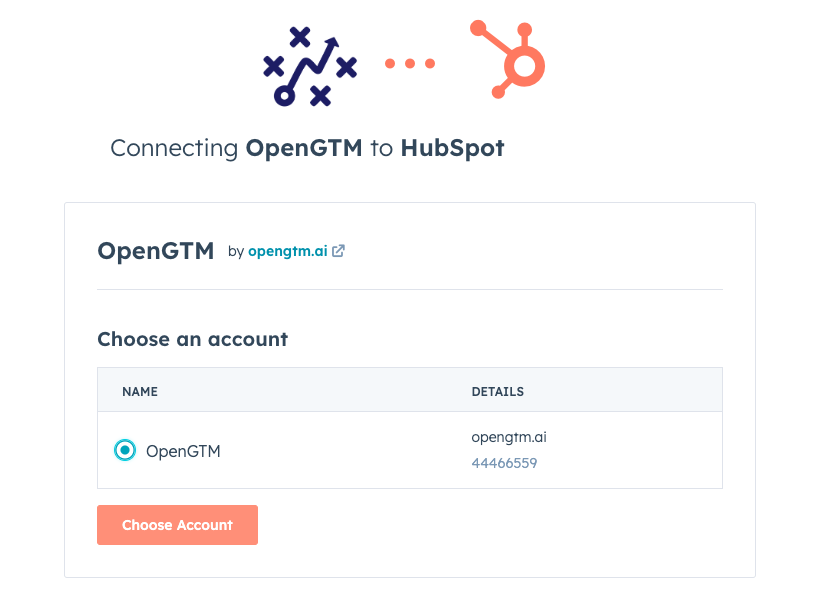
Select Your Account: Once logged in, you will be prompted to choose a Hubspot account from your organization. Select your preferred account and select the Choose Account button to proceed to the next step.
-
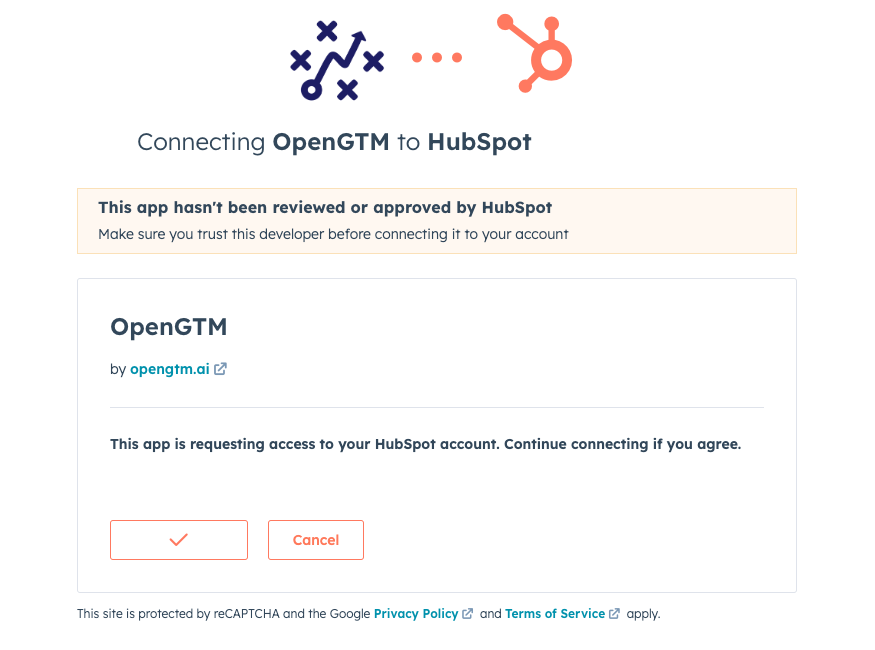
Grant Access: After Selecting your account, you might be asked to grant permissions to the application requesting access. Review and approve these permissions.
-
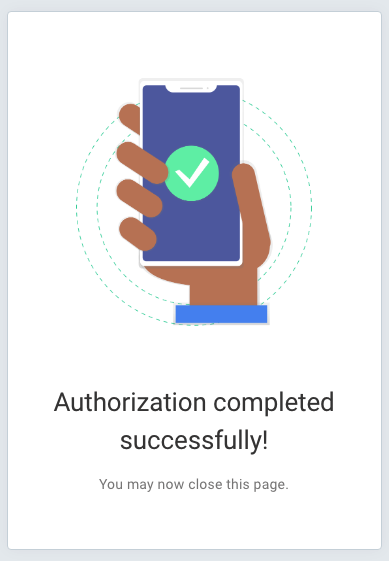
Return to Platform: Once the authentication is successful, you’ll be navigated to a page displaying the below success confirmation. Feel free to close the tab and return back to the integration setup wizard.
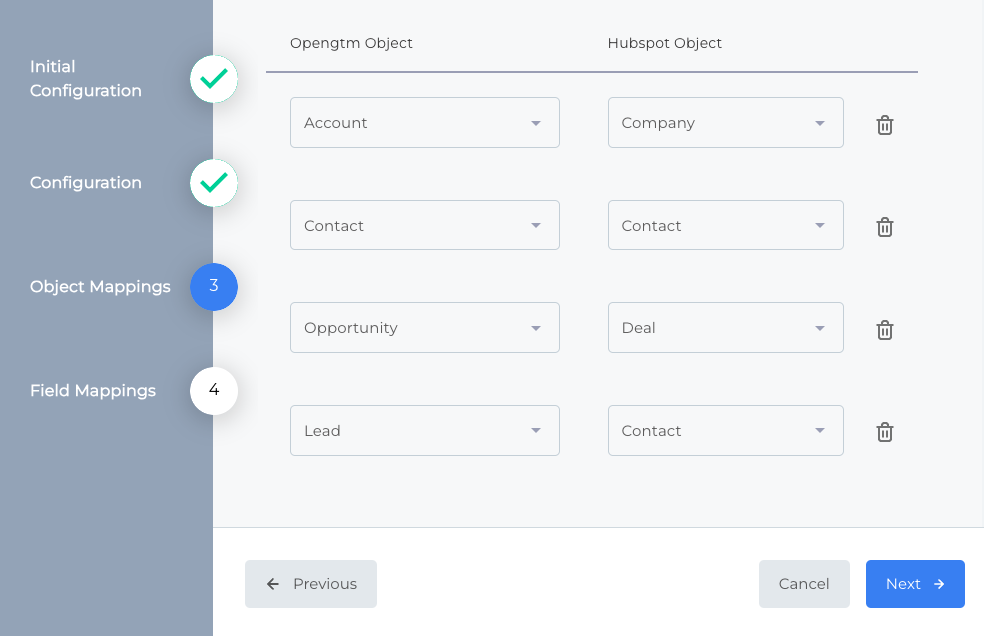
Step 4: Confirm Object Mappings
-
Select Object Mappings: Now that you're authenticated, the next step involves mapping Hubspot objects (like Contacts, Companies, Deals) to their OpenGTM counterparts. This step ensures that the data flows correctly between systems.
-
Examine Default Mappings: Take a look at the default Hubspot objects. These mappings will determine how data from Hubspot corresponds to the OpenGTM schema.
-
Confirmation or Adjustments: If the default mappings align well with your requirements, proceed to step 4. If you would like to alter the mappings for a better fit, use the provided dropdown menus to select the Hubspot objects that align more closely with those in OpenGTM. Keep in mind that if you have custom objects, they will show in the dropdown.
-
Finalize the Process: Once you have reviewed and are satisfied with the mappings, confirm your choices by selecting on the 'Next' button. This will finalize the mappings and take you to the next step in the integration process.
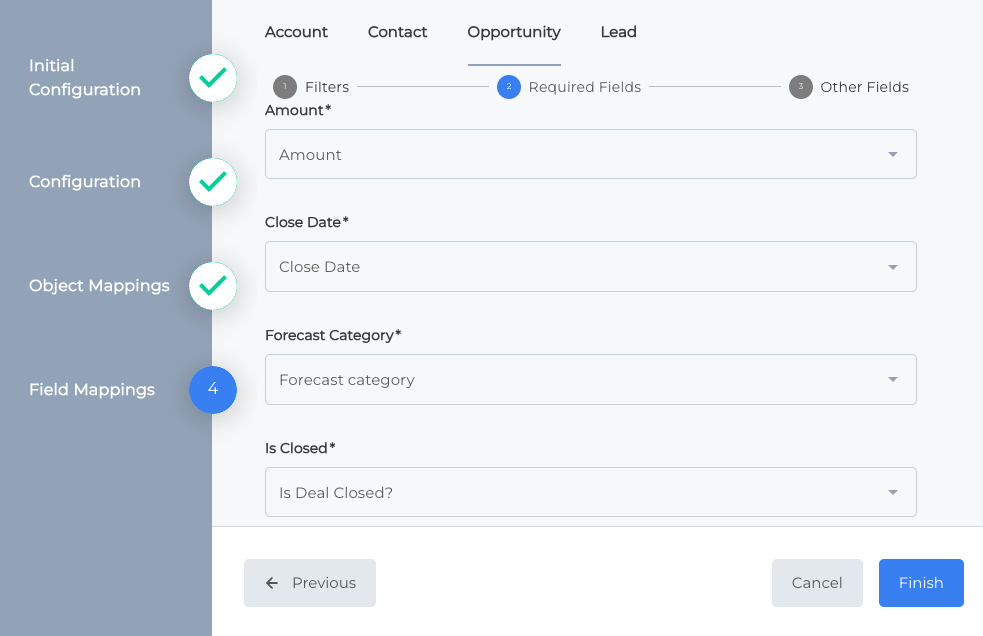
Step 5: Confirm Field Mappings
-
Review Required Field Mappings: Review the standard fields mapped by default and replace with the fields you are using. For example, if you don’t use the standard industry field then map OpenGTM’s industry field to your custom industry field.
tipFor the Lead object, make sure lead/contact conversion to deal creation is defined and a conversion date and conversion true/false field are mapped in the field mappings or OpenGTM will not be able to perform the analysis required for lead scoring.
 info
infoErrors will prevent you from completing your integration. Make sure all OpenGTM fields are mapped to a Hubspot field. Complete required fields and use the trash can icon to remove uncompleted rows.

-
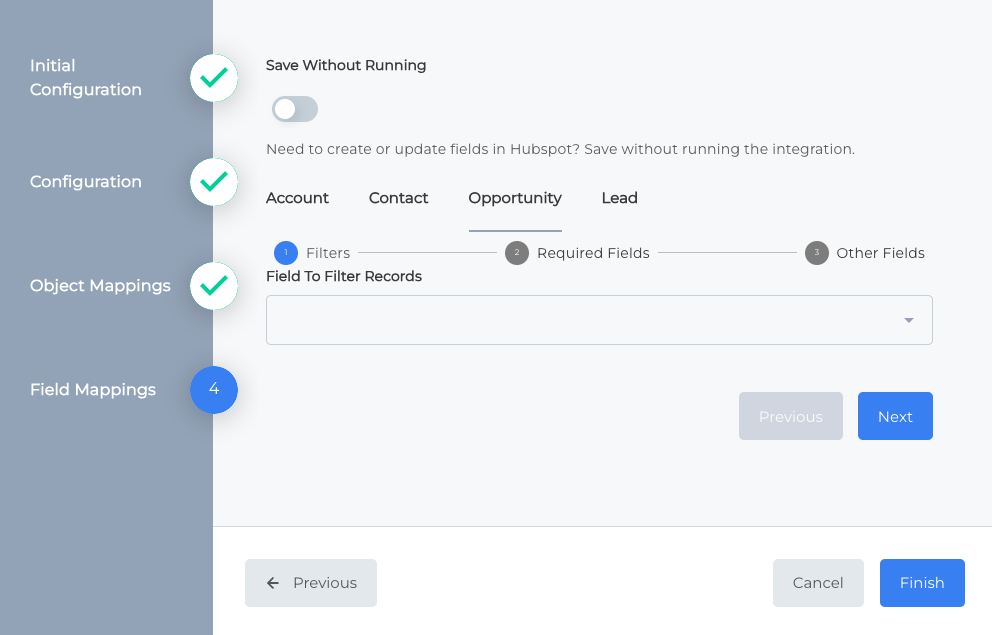
Set Filter Records Field: Using a field with the value of true or false, you can filter what records you sync to OpenGTM. Records where the value of the field mapped is true are synced. If you do not map a field to filter records then all records for that object will be synced. This may cause an error if the number of records for the lead and/or opportunity object exceeds the team's record storage limit (see Manage Team for more details). The account and contact objects will only sync records related to opportunity records that sync to OpenGTM.
-
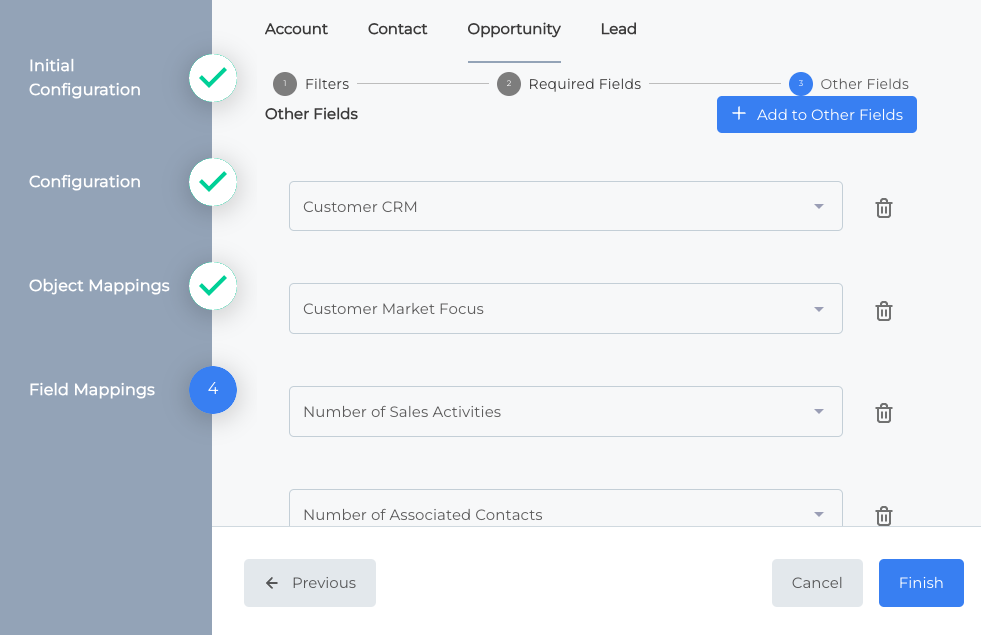
Add Other Fields (Optional): Using the add field button, add other fields. You can then set any Hubspot field available on that object. You can continue to repeat this process until you have all the fields for each object that you would like to use to generate personas and inform predictions.
-
Confirm and Finalize: Once you are satisfied with the object and field mappings, confirm and finalize the setup by selecting on the Finish button.
Completion and Next Steps
-
Finish and Exit: After completing all steps, select the Finish button. After you will be navigated back to the following screen with a green checkmark indicating a successful and active integration.
-
Next Steps: Now that your integration is setup, the application will begin syncing data between Hubspot and OpenGTM.
Deleting records in OpenGTM is currently unavailable, but will be available soon. If you have mapped a filter field or have deleted records in the CRM after your initial sync don't hesitate to reach out to support to get those records deleted.
By following these steps, you should be able to successfully integrate Hubspot with OpenGTM. Remember, the key to a smooth integration process is careful review and confirmation at each step, ensuring that all mappings and settings are correctly aligned with your business processes and needs.
Making Changes and Updates
OpenGTM also allows you to update your integrations easily. Your integrations can be found using the navigation bar on the left side of the screen. Here you will be able to view, configure, and manage all of your integrations in one place.
Let’s take a closer look at the Hubspot integration example. After selecting on the Hubspot tile, a modular window opens with a few different options. Selecting the reconfigure button will allow you to edit any part of the integration settings including object and field mappings. Selecting on the three dots next to the “Reconfigure” button will open a menu with a few different options:
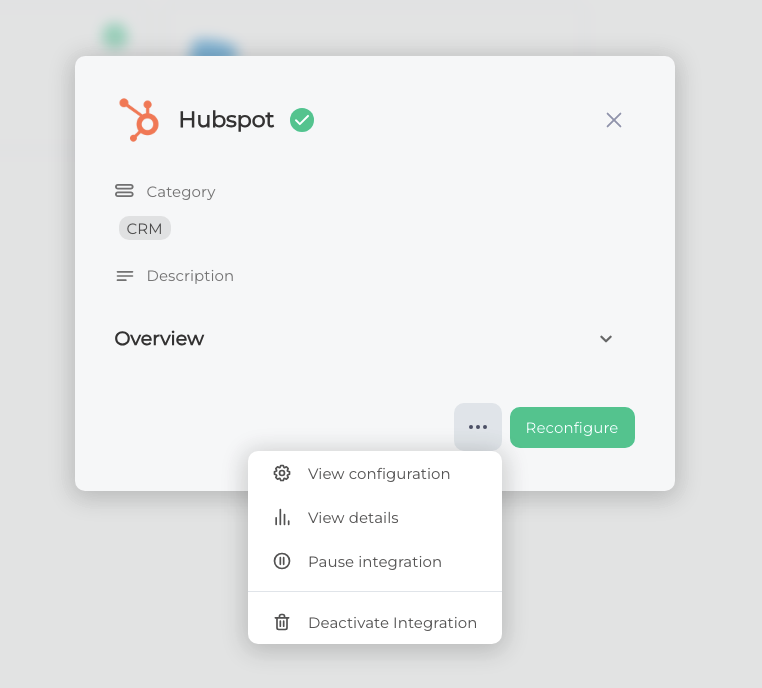
- View Configuration: This allows you to validate the integration connection and object mappings and field mappings.
- View Details: This provides full details about the integration, including a summary-level view, options to test the integration, detailed logs and execution history, and any alerts that have been configured for the integration.
- Pause Integration: This option allows you to stop the integration from running.
- Deactivate Integration: Deactivating an integration will delete the integration and is not reversible. After, you will be prompted to confirm the deletion intent by typing the word
Deletein the input field. Select the deactivate button to remove the integration from the OpenGTM platform.
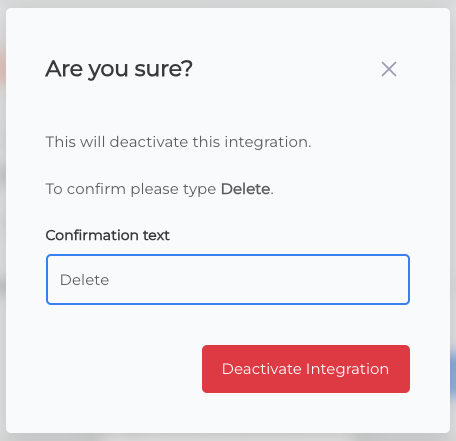
⚠️ Deactivating an integration will delete the integration and requires a new integration to be setup before continuing to use the platform.